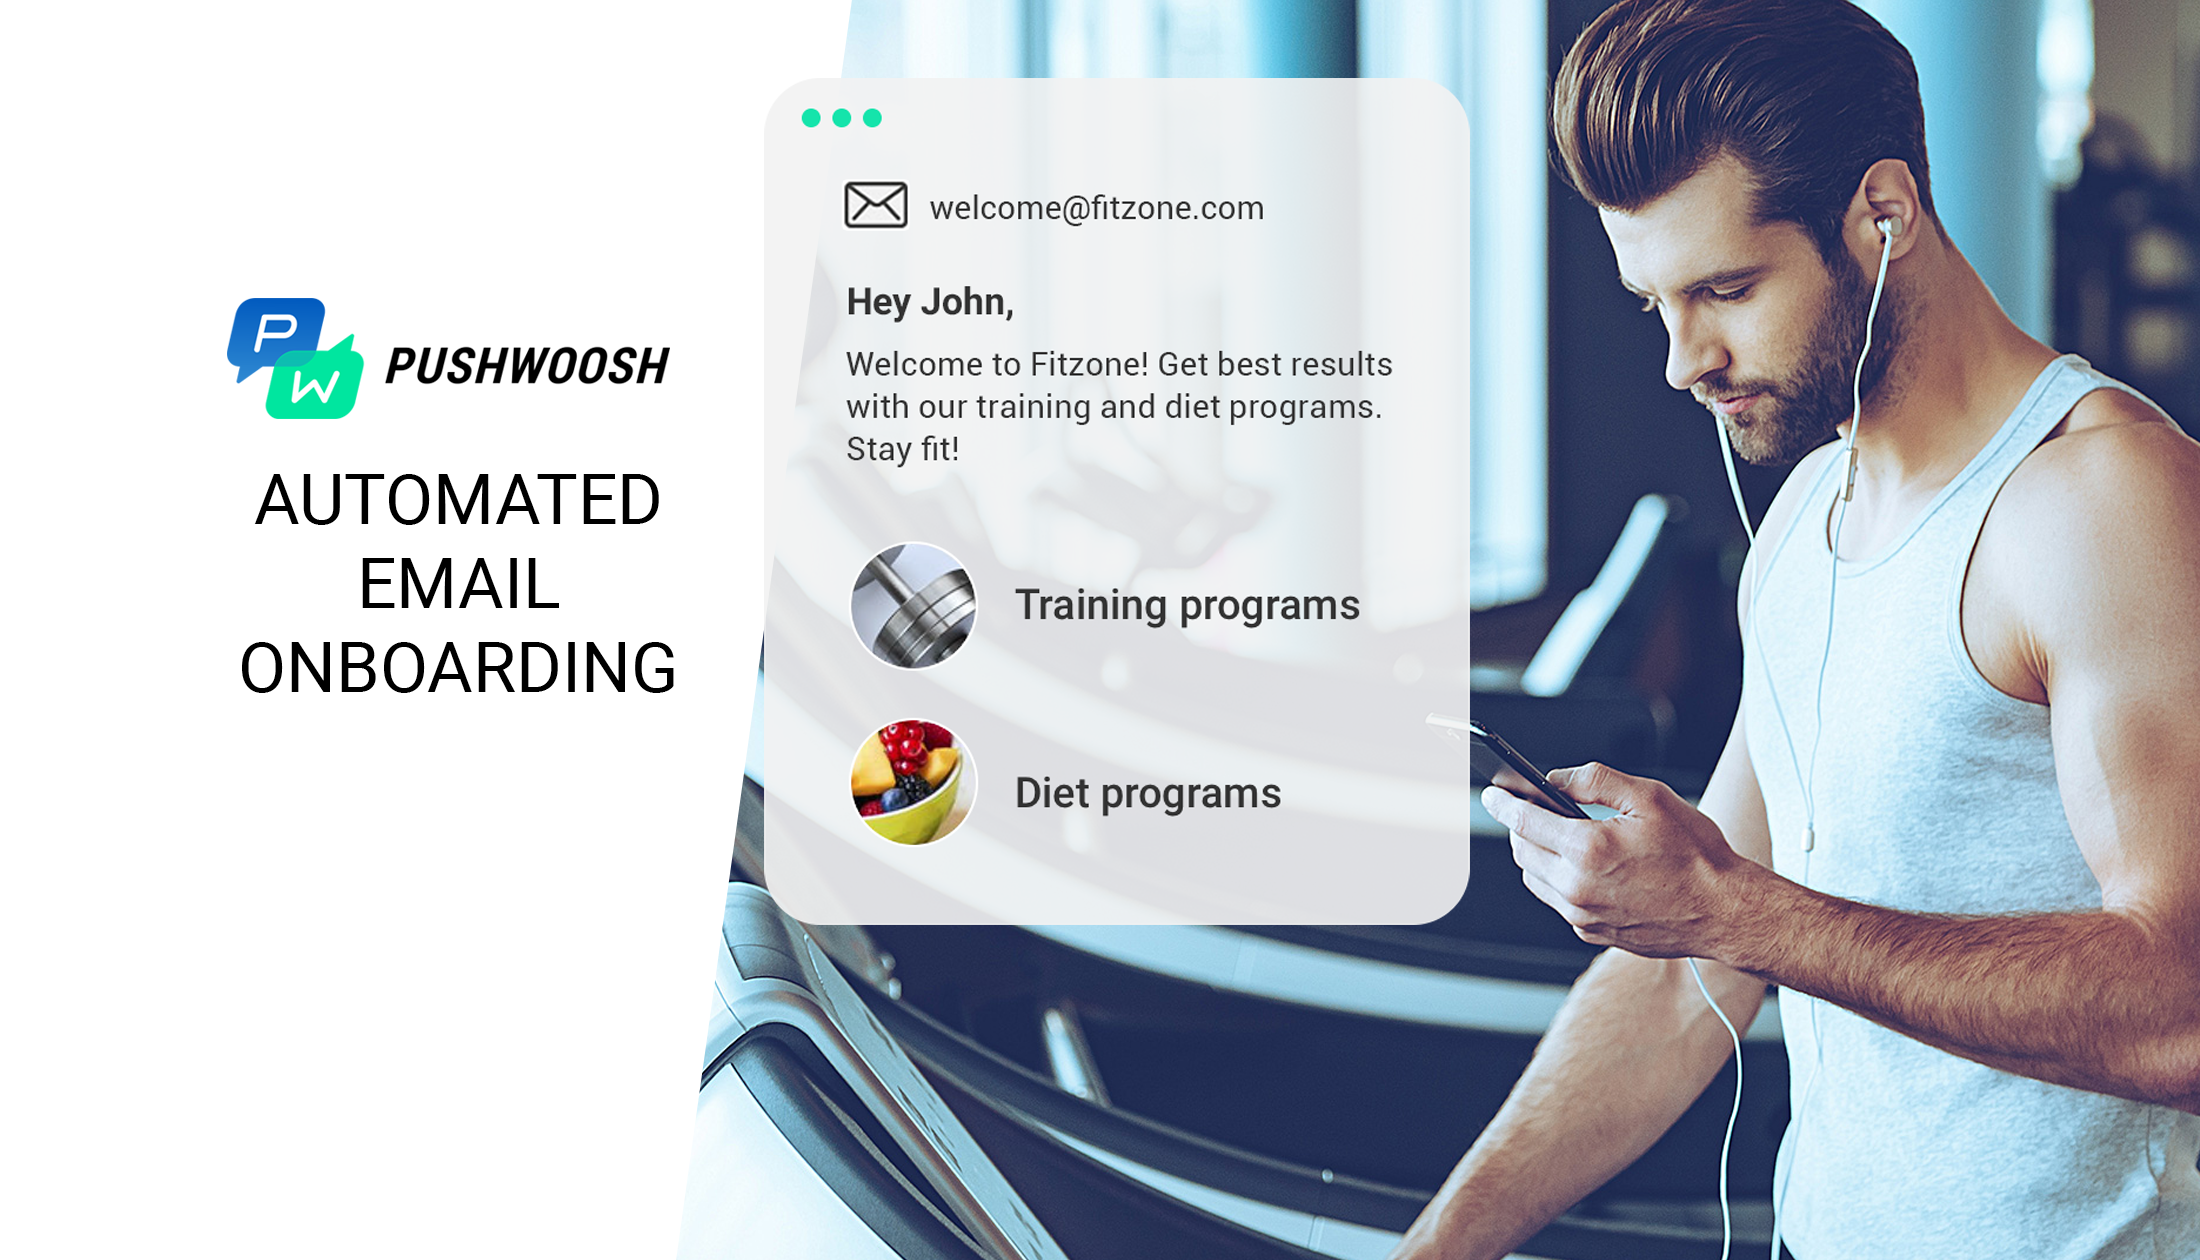
Automate your email marketing with triggered messages and increase the relevance and efficiency of your communications. Cost-effective Pushwoosh Emails allow building long-term loyalty and boost your revenue.
User onboarding is extremely important for increasing customer LTV and retention. It moves new customers down the sales funnel by telling them about the values of your products and motivates them to make their first purchases. In fact, successful activation can boost a user’s lifetime value by up to 500%!
Automated emails have a bunch of serious advantages and allow reaching your users with relevant messages at high-impact moments. Triggered messages are:
- personalized (your communications are aligned to every user's customer journey)
- timely (your messages are delivered at high-impact moments, as soon as a certain event occurs)
- highly relevant, always to the point
To schedule email delivery based on users’ behavior, follow this simple step-by-step guide:
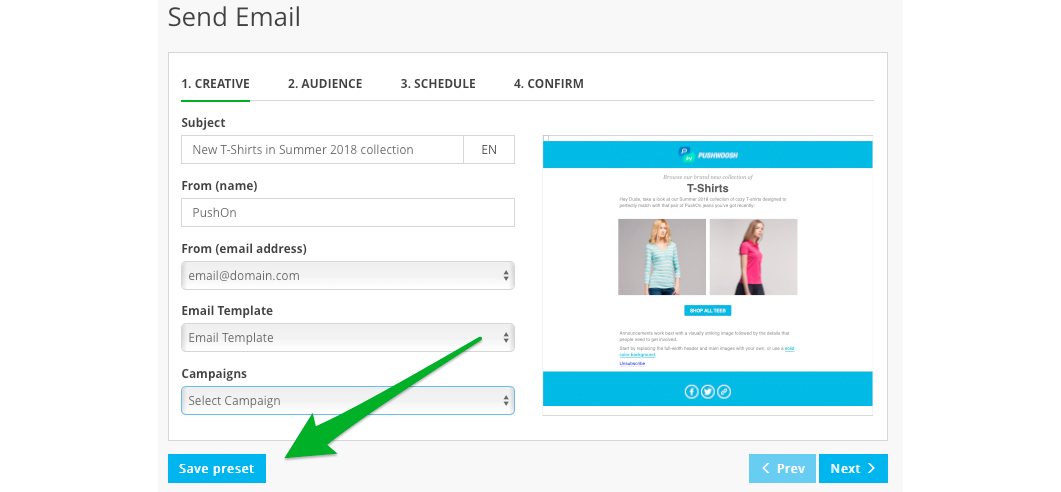
1. Create a preset
To specify the content of a triggered message, use Email Presets (which are reusable content templates). In your Pushwoosh Control Panel, go to the Send Email section. Fill in the forms of the "Creative" step and press the Save Preset button.
2. Create an event
Once your user performs a certain action in your app (thus triggering a corresponding Event), our SDK detects this Event happening and automatically schedules a message to be sent. To set up a Triggered Message, you have to create an Event in advance.

3. Set a triggered message
NOTE: Since May 1st Triggered Messages have been improved and transformed into Customer Journey. Learn more here.
a. Enter the name of a new Triggered Message.

b. Set up triggering rules.
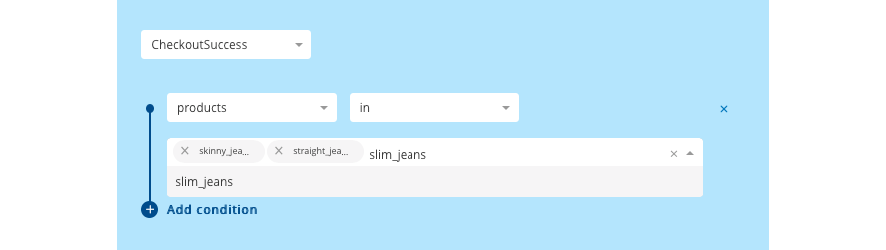
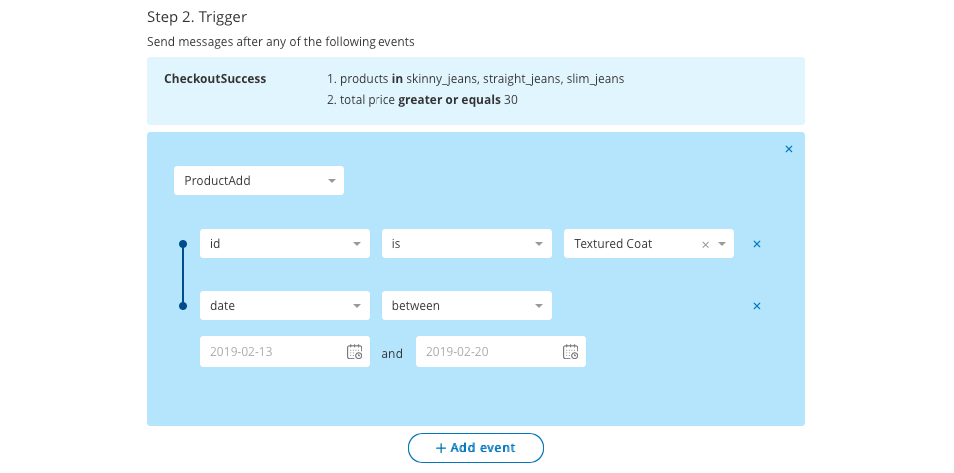
Here, specify one or more Events to trigger messages. Messages will be sent when any of the Events take place. To add a Trigger Event, choose it from the drop-down.

If needed, press Add condition to specify Event attributes. Select an attribute from the drop-down and set its operator and values in the corresponding fields. For each Trigger Event, you can add several attributes.
You can specify several Events as triggers. If you do, Pushwoosh will schedule a message as soon as ANY of them occurs. Same goes for Cancellation Events.
c. Specify the content of the messages and set up a delay.
Choose a Preset to be sent after a Trigger Event. Both Push and Email Presets are available to choose. Presets are marked with the "push" and "email" labels and arranged by communication channels.
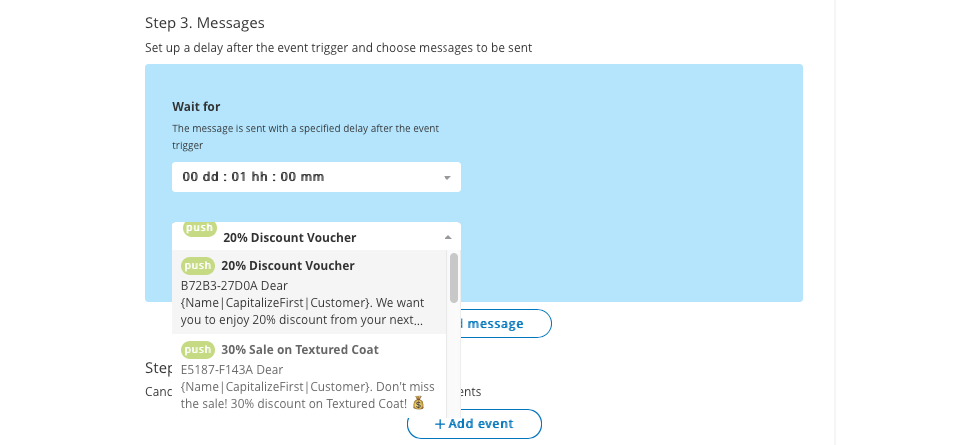
Set up the delay between Event occurrence and message sending. For example, if you set the Wait for property to 1HH 0mm, the message will be sent in one hour after the Event takes place.

You can add several messages. To schedule a chain of triggered messages, press the Add message button.
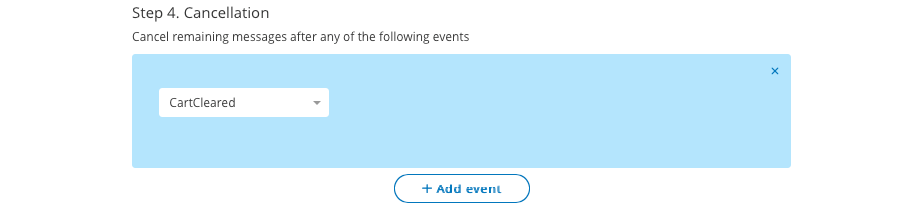
d. Set up cancellation rules
When the Trigger Event occurs, Pushwoosh will wait for a specified time and send messages you selected on step 3. To cancel remaining messages, add Cancellation Events. The flow is the same as for Trigger Events. Please note the messages that have been sent already cannot be cancelled. For example, if the delay time hasn’t expired yet and no messages are sent, all of them are cancelled. If some of the messages have been sent already, the waiting ones are cancelled.
e. Gather statistics
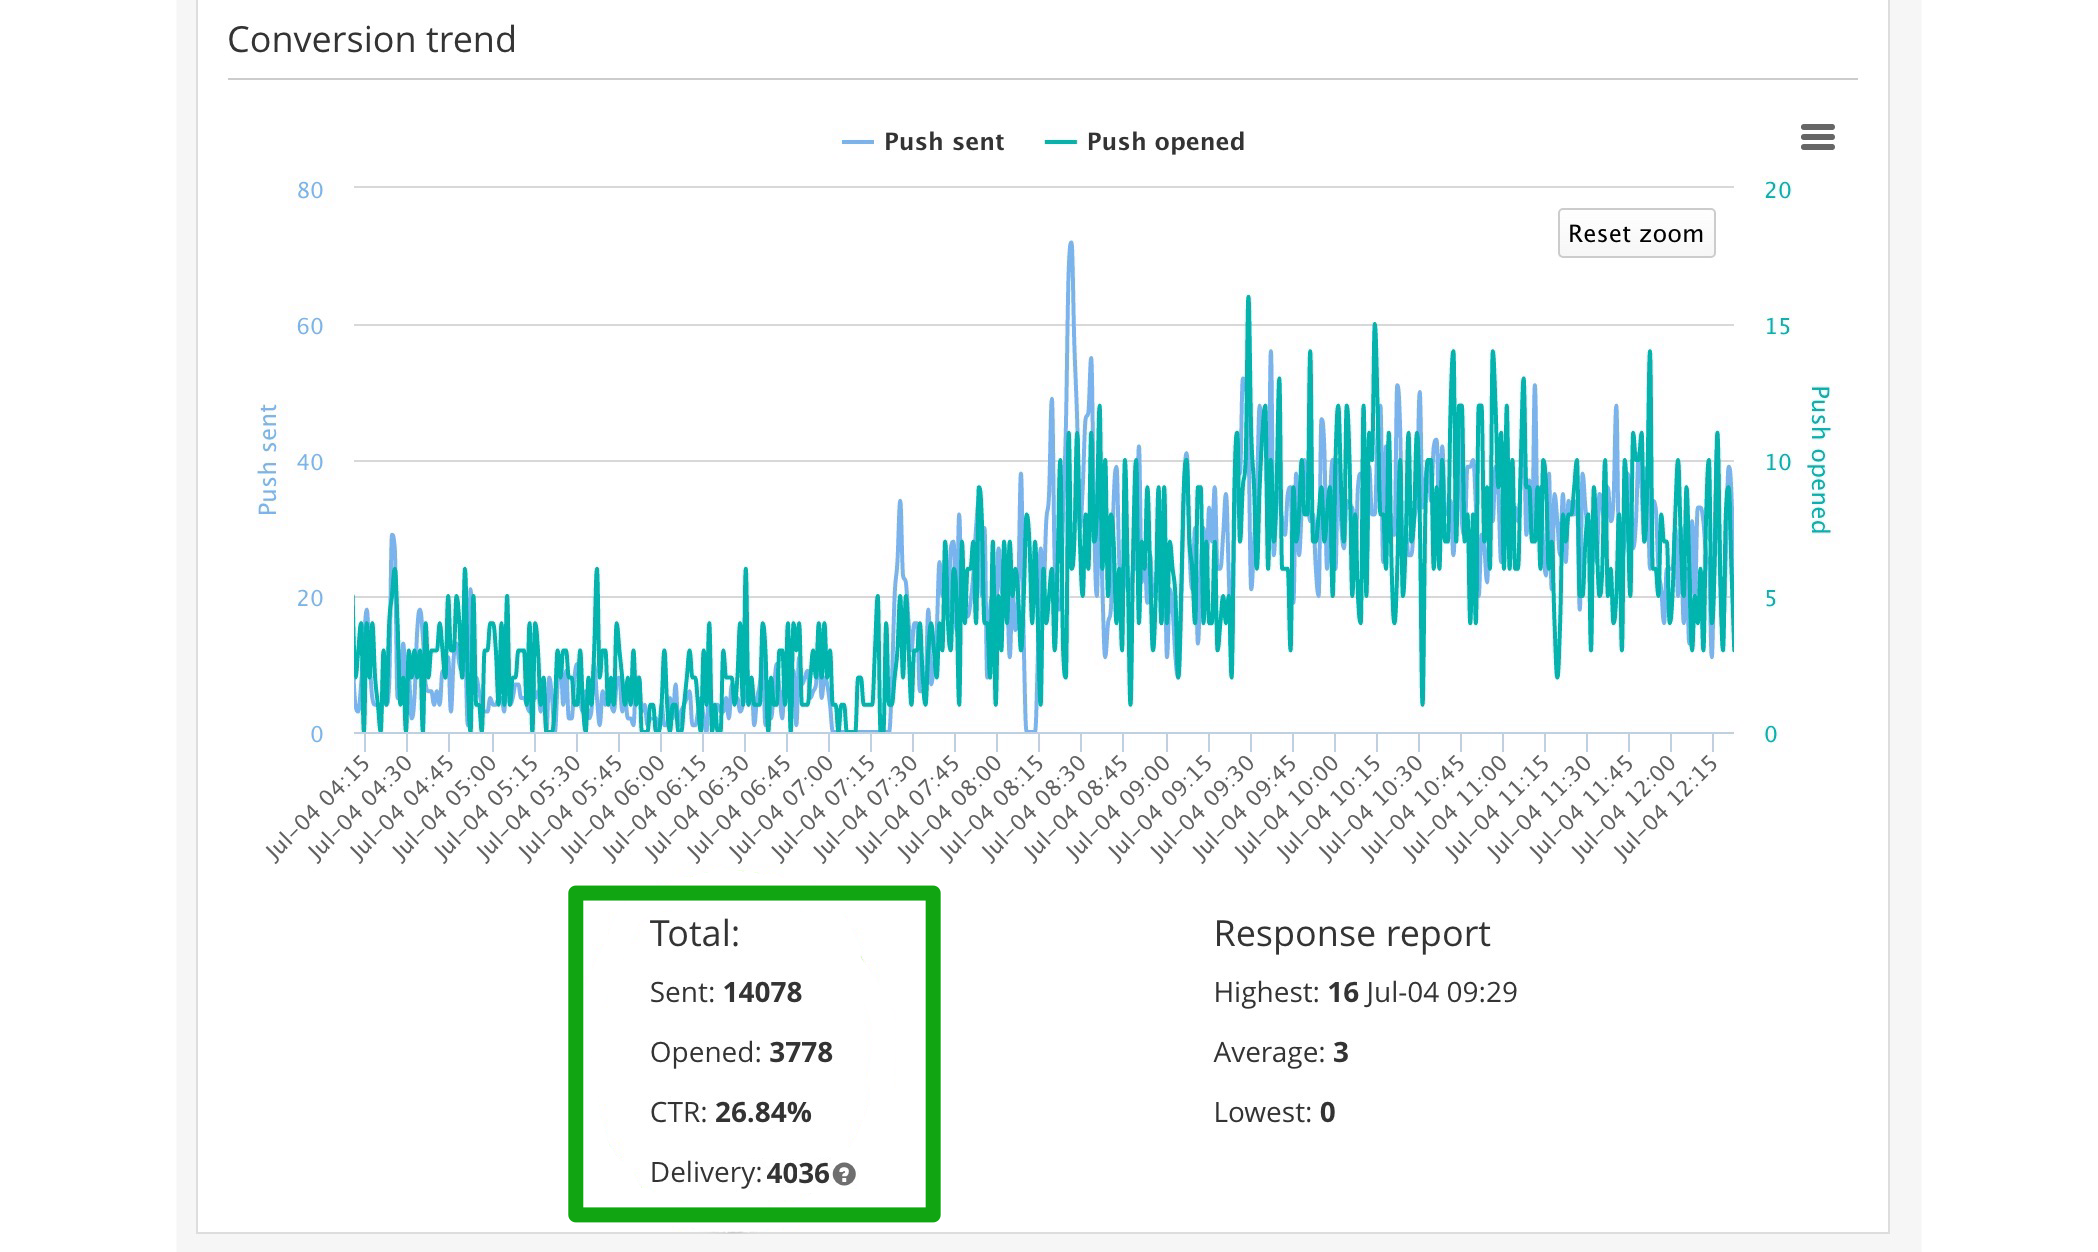
To make the event-triggered messages statistics easy to analyze, we strongly advise associating your Preset with a campaign. To analyze the results of a Triggered Message, assign a campaign to your Preset.
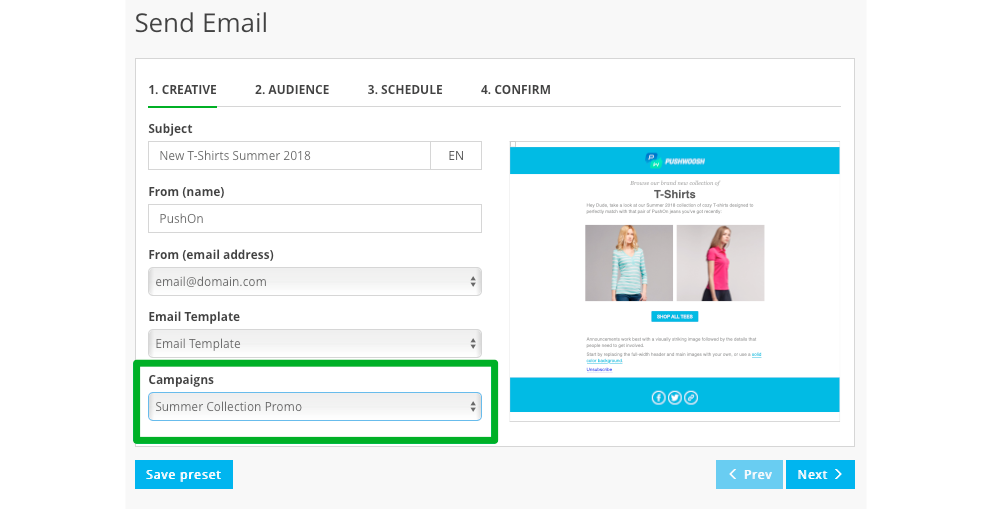
Associating a Preset with a campaign, you will gain sent, open, and click-through rates for Triggered Messages sent in the course of that campaign.

And that is how you use Triggered Emails!
Try Pushwoosh Email Service now to boost your click-through rates and conversions!
